Creating an image gallery (displaying images in a grid)
If, after following the tutorial below, you can’t get the images to open on a lightbox, then please read here how to fix that: Fix lightbox links not being added to images.
If you have many images you wish to use as a gallery, you need to add a File Upload field to your Gravity Forms form (if it doesn’t already have one), then enable functionality using the steps below. Note: the gallery currently only works with images, not audio or video uploads.
Prefer to Watch the Video?
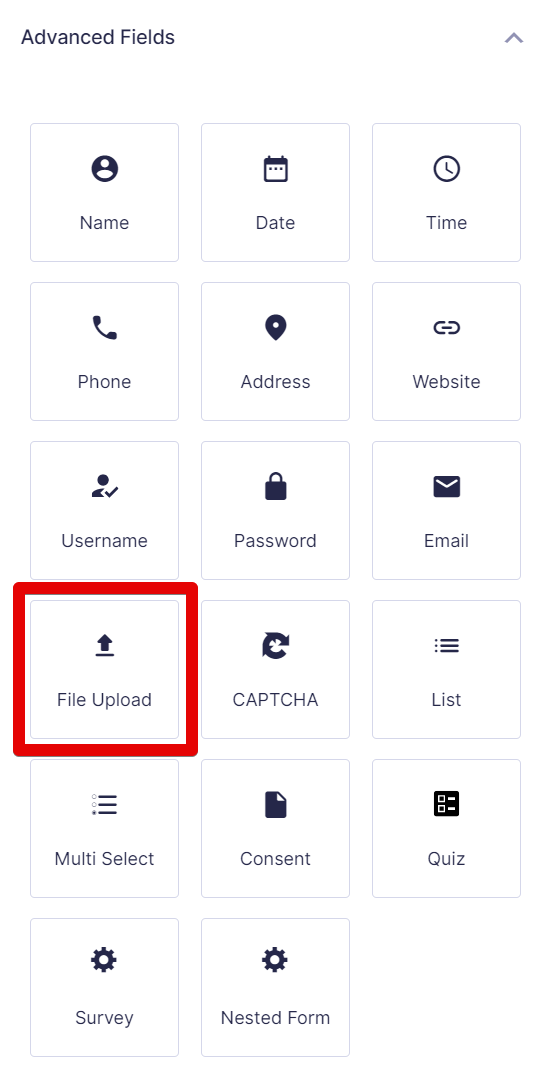
Add a File Upload Field #
(If your form already has a File Upload field, you can skip this step.)
In the Gravity Forms editor, click File Upload to add a File Upload field to your form.
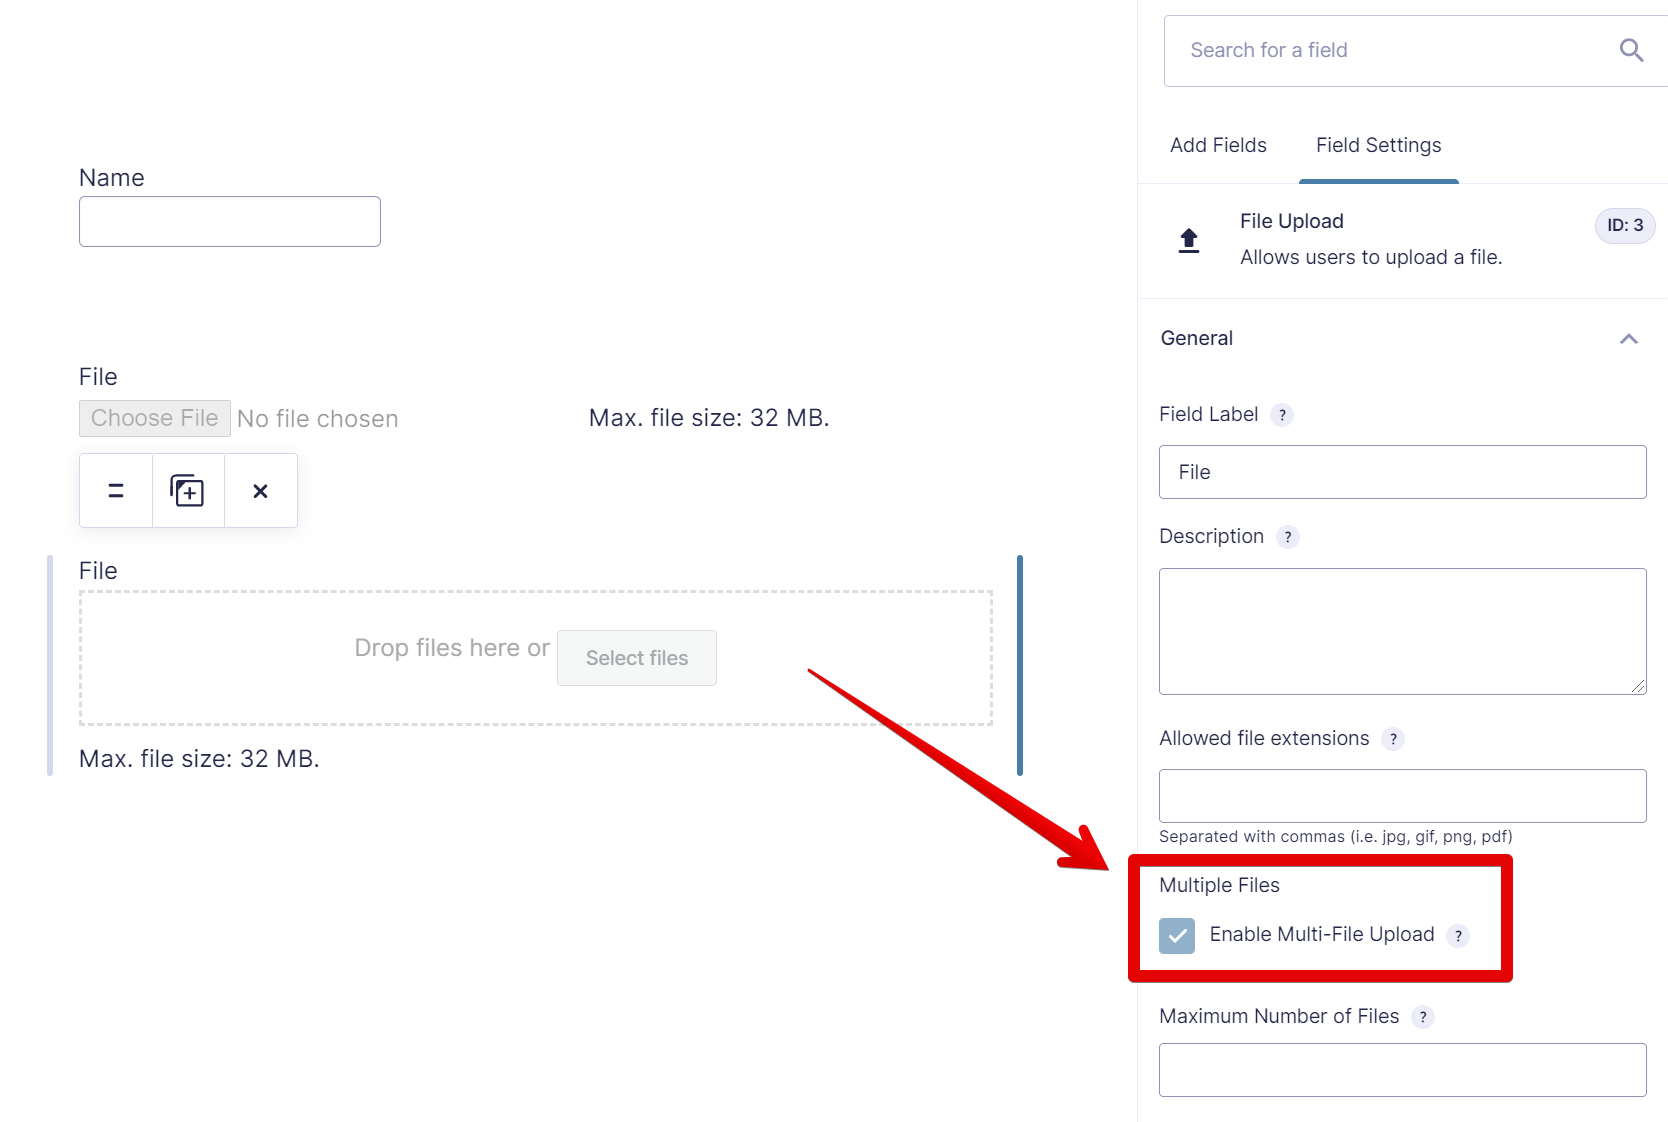
Enable Multi-File Upload #
Check the setting named “Enable Multi-File Upload” to allow uploading more than one image at a time. This will allow the images to be grouped into a gallery instead of shown one at a time.
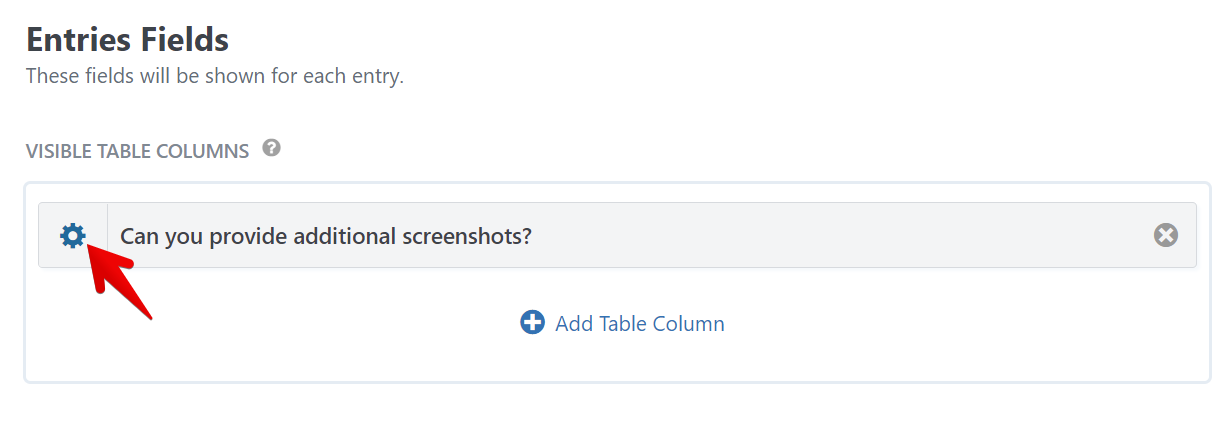
Edit the View you would like to add a gallery to #

Click the gear icon on the Multiple File Uploads field #
Choose the field you want to turn into a gallery.
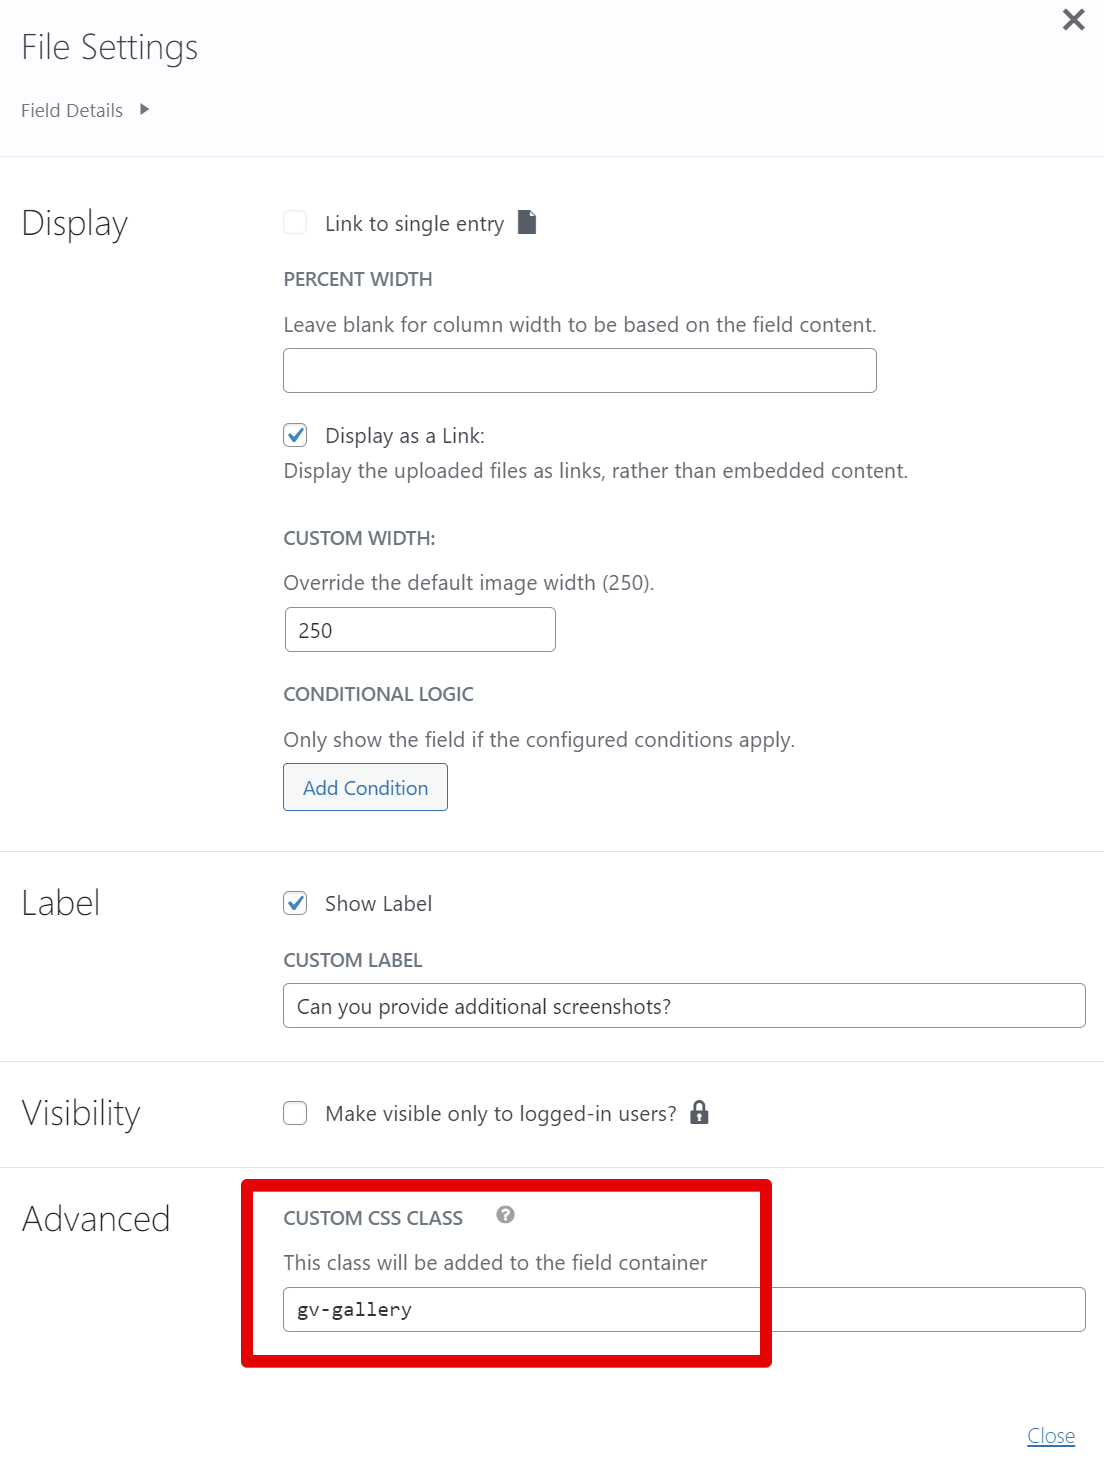
Set the Custom CSS Class to “gv-gallery” #
Make sure to use gv-gallery without the quotes, like so:
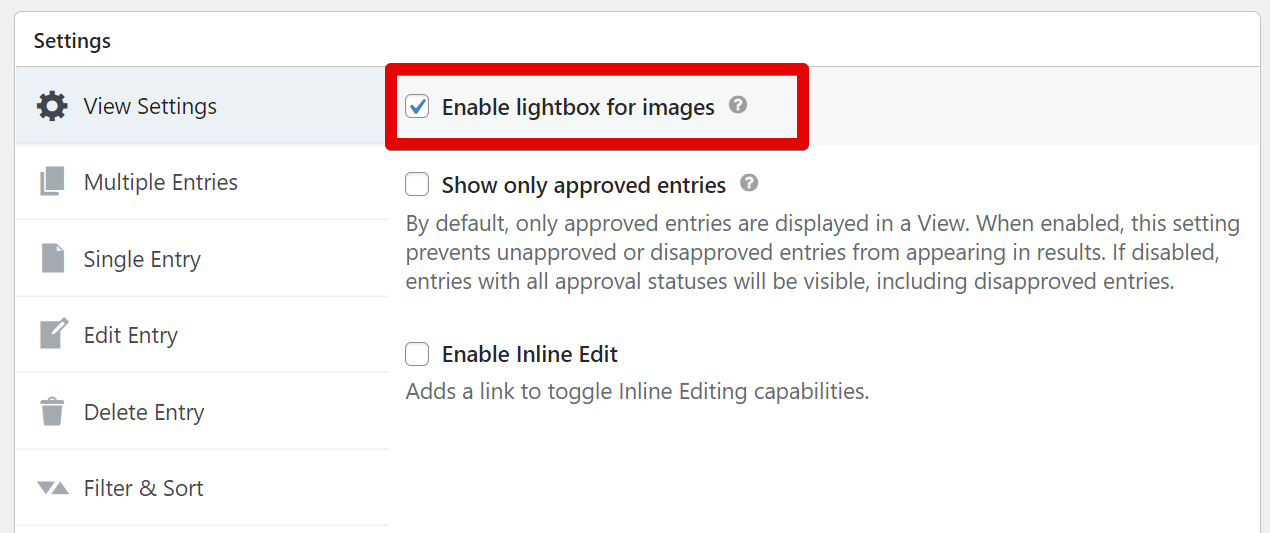
Check “Enable lightbox” in the View Settings box #
If you don’t enable the lightbox, the images will still look better, but the slideshow functionality will not work. See the bottom of this how-to for an example.
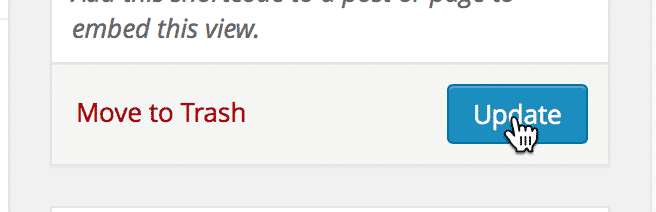
Save or update the View #
Edit (or create) an entry for the form and upload images to the field #
You can add as many images as you like. Once uploaded, they will be displayed as a gallery.

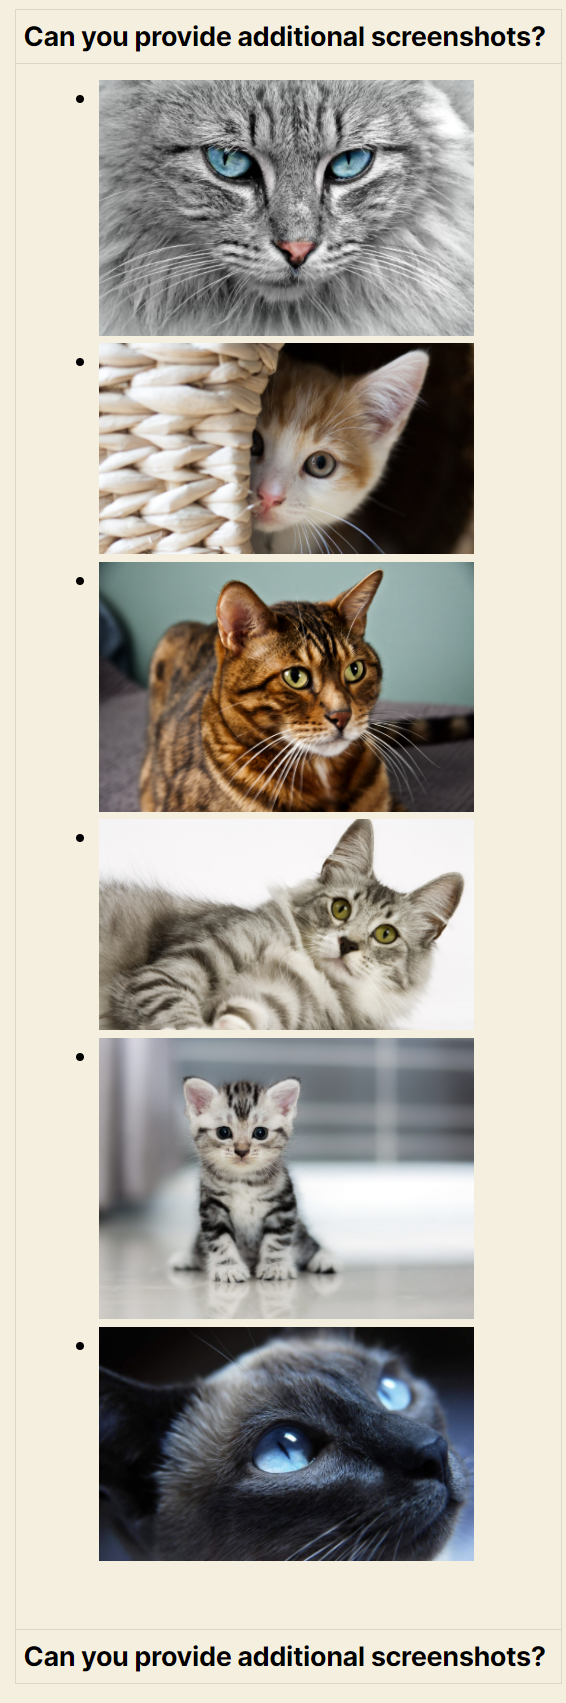
Before #
Before: each image is displayed full-size and as a bullet list.
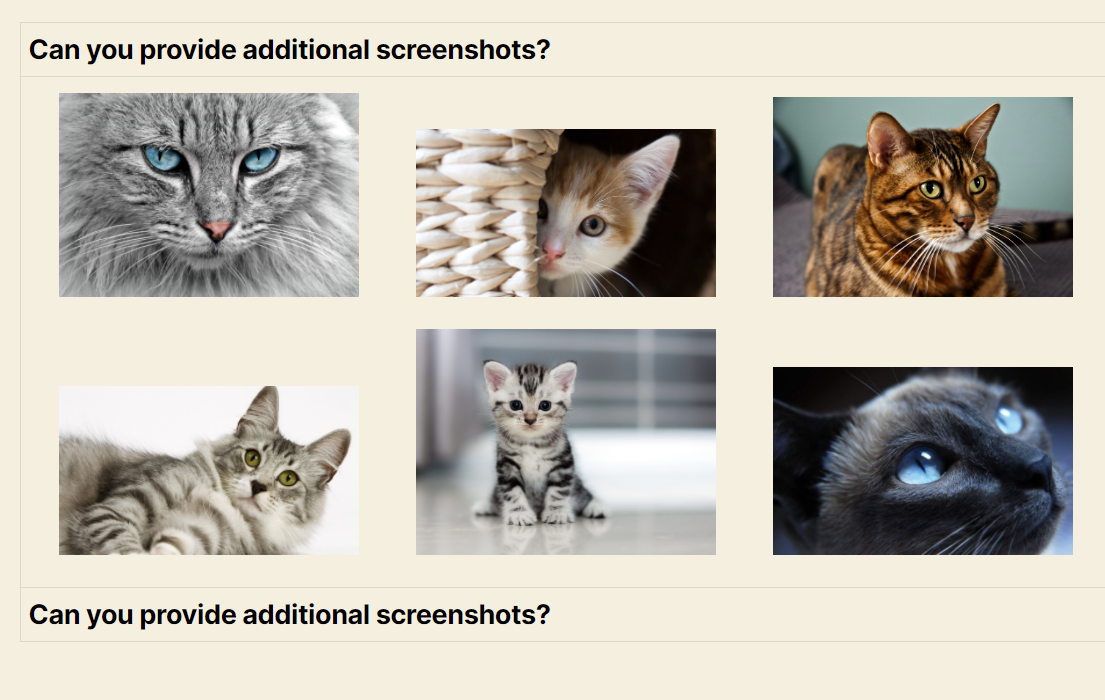
After #
After: the image sizes are reduced and the images are displayed as a grid.
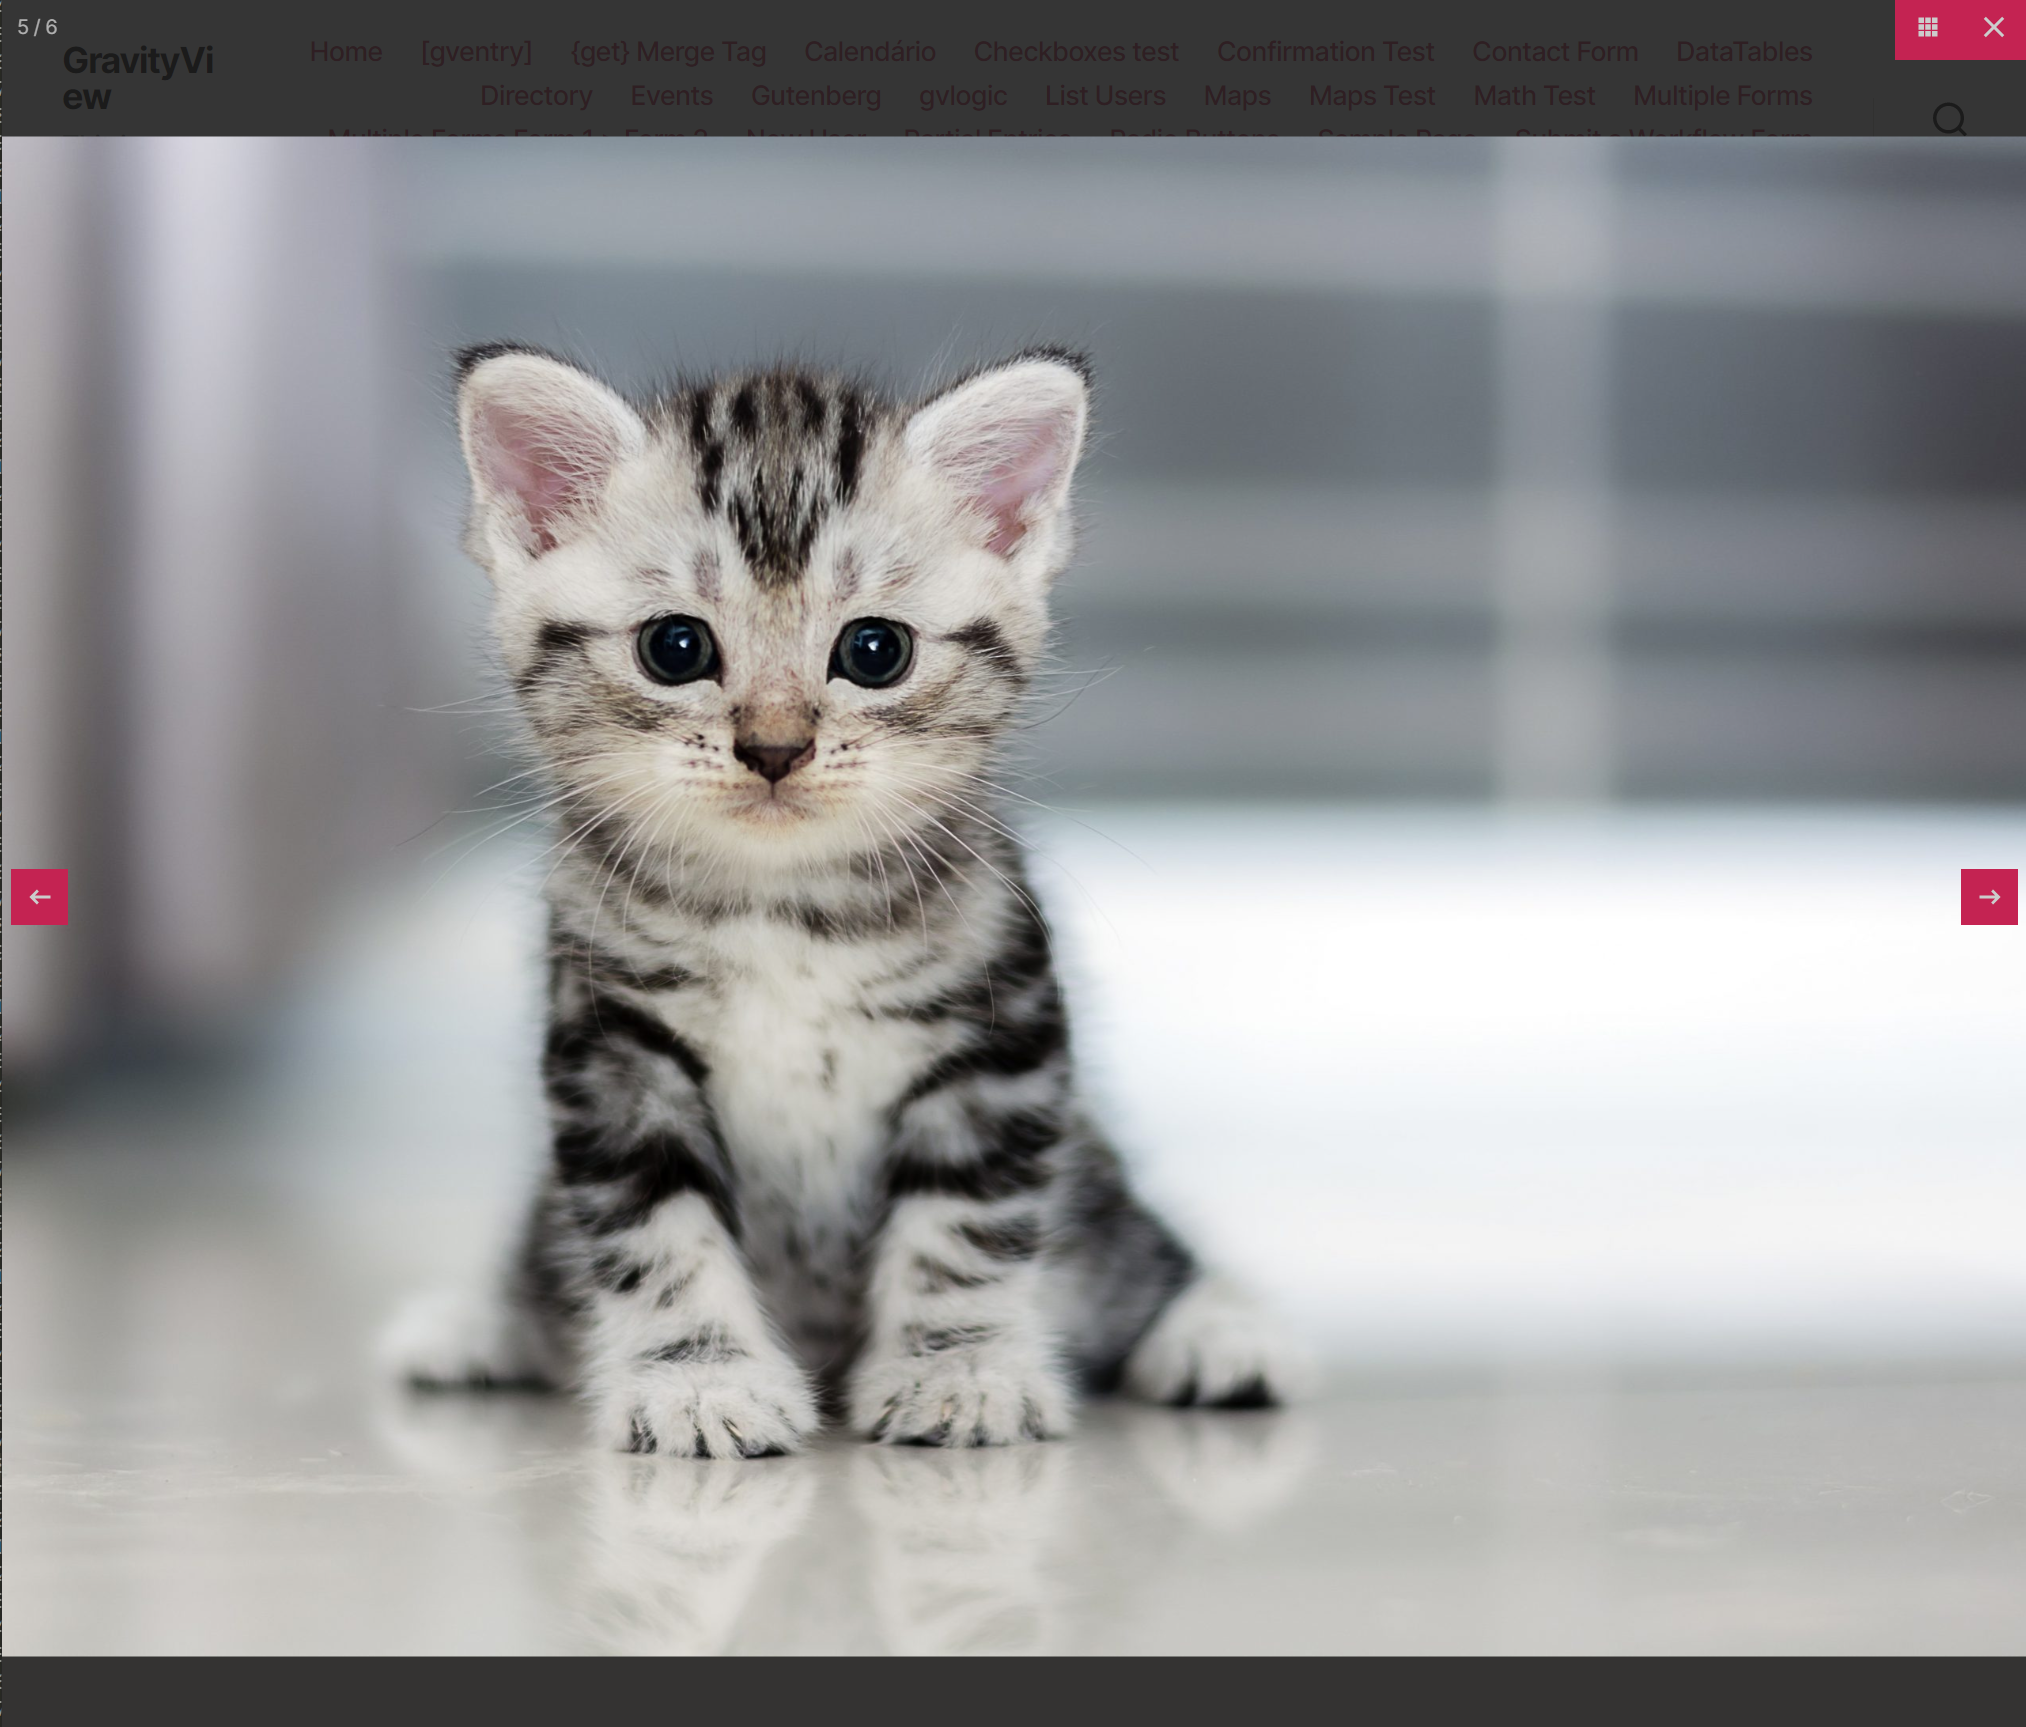
And clicking any gallery image will zoom in #
You can then navigate between the images using the left and right arrows.
Was this page helpful?
- Add a File Upload Field
- Enable Multi-File Upload
- Edit the View you would like to add a gallery to
- Click the gear icon on the Multiple File Uploads field
- Set the Custom CSS Class to “gv-gallery”
- Check “Enable lightbox” in the View Settings box
- Save or update the View
- Edit (or create) an entry for the form and upload images to the field
- Before
- After
- And clicking any gallery image will zoom in